If you’re planning dental implants or already have them, your gum health can make or break the outcome. Healthy gums and supporting bone give implants the stable foundation they need to fuse with the jaw.
Active gum disease weakens that foundation and raises the risk of implant failure and complications like peri-implantitis. Treating gum disease before implant placement and keeping up strict oral hygiene afterward can really boost your chances of success.
This piece digs into how gum disease messes with implant integration. We’ll look at which periodontal problems matter and share practical steps you can take before and after surgery to protect your investment—and if cost is a concern, finding a dentist within budget in Honolulu doesn’t mean you have to compromise on the quality of care you need.
Connection Between Gum Health and Implant Integration
Healthy gums and underlying bone team up to secure an implant and keep infection at bay. If either tissue is compromised, you risk poor osseointegration, gum recession, and, honestly, long-term implant failure.
Biological Processes in Osseointegration
Osseointegration means your implant surface connects directly with living bone. After your dentist places the implant, osteoblasts migrate to the titanium or zirconia and start laying down new bone.
As mineralization continues over weeks or months, stable mechanical contact forms. But inflammation really throws a wrench in this process.
Elevated cytokines and bacterial toxins ramp up osteoclast activity, which starts breaking down the bone next to the implant. The way your dentist places the implant, the position, and how much pressure it gets during healing all matter a lot for successful integration.
Here’s what you can control:
- Choose an implant surface and design that encourages bone contact.
- Make sure surgical placement is spot-on to avoid gaps or movement.
- Keep infection and excess force to a minimum during healing.
Role of Healthy Soft Tissue
Healthy gum tissue forms a seal around your implant, creating a barrier that keeps bacteria out. Keratinized mucosa and tight connective tissue help keep pocket depths shallow and lower inflammation risk.
If your soft tissue is thin, not keratinized, or receded, the seal gets weaker. That means more plaque, tougher cleaning, and a higher chance of trouble.
Soft-tissue grafting or adjusting your prosthetic contours can beef up tissue thickness and make cleaning easier.
Things to keep an eye on:
- How much keratinized tissue is around your implant.
- Pocket depth and whether you bleed when probed.
- Whether your prosthetic shape allows you to brush and floss properly.
Gum Disease Impact on Bone Quality
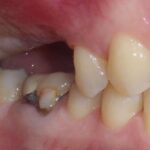
Periodontal disease brings in nasty biofilms that spark chronic inflammation and bone loss. If you’ve got active periodontitis or have lost a lot of bone before, there might not be enough left for a stable implant.
Inflammation-driven bone loss reduces support and makes it hard to get good initial stability. Your dentist might recommend bone grafting, guided regeneration, or even staged surgery to rebuild bone before placing an implant.
Even after grafting, lingering periodontal bacteria can mess up healing and bone maintenance.
Your dentist will look at:
- X-rays to check bone height and density where the implant will go.
- Any remaining gum pockets or signs of infection.
- Whether you need bone augmentation or gum treatment before surgery.
Types of Gum Disease and Their Influence
Gum disease can be mild and reversible or destructive enough to damage bone and tissue. Each stage changes the timing, healing, and stability of implants.
Effects of Gingivitis During Implant Placement
Gingivitis causes redness, swelling, and bleeding but doesn’t eat away bone. If you only have gingivitis, you can usually get your implant after treating the inflammation with a cleaning and better home care.
If you skip treating gingivitis, you’re more likely to get an infection after surgery and your healing might slow down. Your dentist will check for bleeding and make sure your gums look healthy before moving forward.
What you’ll probably need:
- Professional cleaning to remove plaque and tartar.
- A quick follow-up (maybe 2–4 weeks) to make sure your gums have settled down.
- Clear instructions on brushing and maybe a rinse before surgery.
Risks Associated With Periodontitis
Periodontitis destroys the structures that hold your teeth—and the bone you need for implants. If you’ve got active periodontitis, getting an implant before controlling it is just asking for trouble.
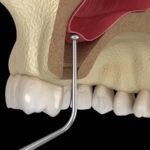
Your treatment will likely include deep cleaning, antibiotics if needed, and sometimes surgery to shrink pockets. If bone loss is bad, you might need bone grafts or sinus lifts.
Here’s what your plan might look like:
- Full periodontal charting and x-rays.
- Infection control and stabilization before implant planning.
- Careful consideration of implant timing, site, and support to lower risk.
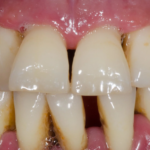
Progression From Mild to Severe Disease
Gum disease often starts as gingivitis and can slide into irreversible periodontitis if you let plaque build up or skip treatment. As it gets worse, pockets get deeper and bone disappears, making implants trickier and sometimes requiring more surgery.
You should watch for early signs—bleeding, bad breath, loose teeth—and act fast. Regular maintenance after treatment or implant placement (usually every 3–4 months at first) helps spot problems before they get out of hand.
Why it matters for you:
- Catching problems early helps keep your implant options open and avoids extra procedures.
- Advanced disease means more steps and longer timelines.
- Ongoing checkups and maintenance really do affect your implant’s future.
Preventive Strategies for Optimizing Implant Outcomes
Focus on finding and controlling infection, scheduling professional cleanings, and getting solid with your daily home care. That’s your best shot at keeping implants and bone healthy.
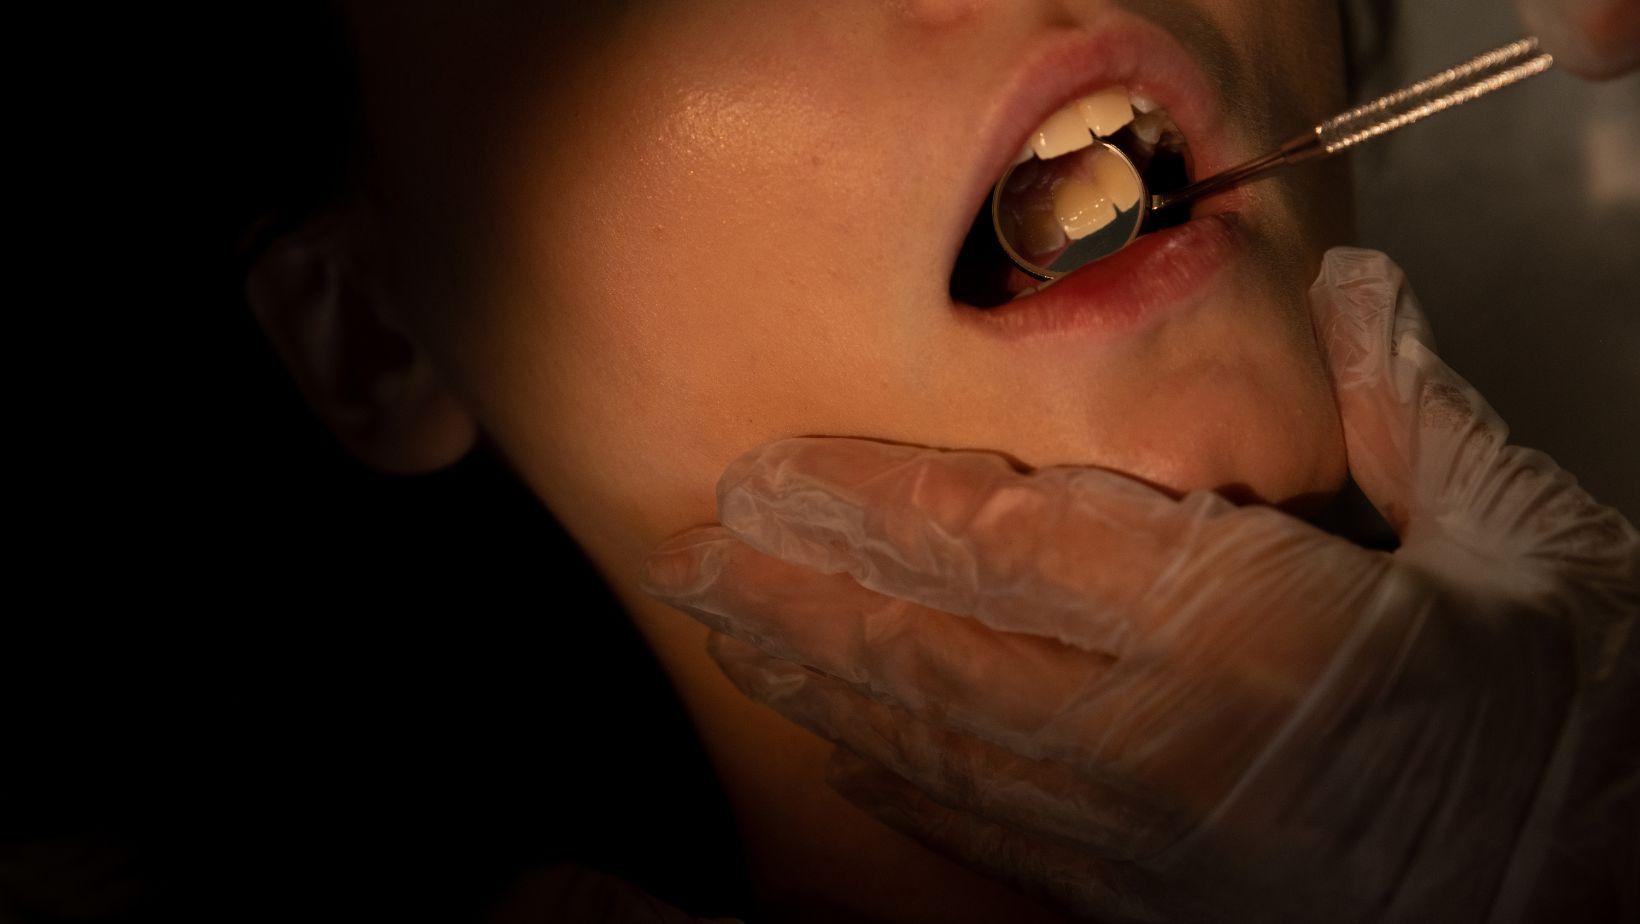
Importance of Pre-Implant Periodontal Assessment
You’ll need a full periodontal chart, x-rays, and a review of risk factors (like smoking, diabetes, or a history of gum disease) before getting an implant.
Your dentist will measure pocket depths, check for bleeding, and look for gum recession to catch any active disease that could threaten your implant.
Treat any pockets deeper than 5 mm and get rid of inflammation with scaling, root planing, and, if needed, antibiotics. If there’s still bone loss or active periodontitis, you’ll have to wait on implants until things are under control.
Be upfront about your brushing habits and medical history. The team should set up a maintenance plan before surgery so you start treatment with infection risk under control.
Professional Cleaning Protocols
Stick to a cleaning schedule based on your risk—usually every 3 months if you’re high-risk, or every 6–12 months if you’re not.
At each visit, your hygienist will clean above and below the gums around your implants and nearby teeth, using titanium or plastic tools and gentle polishers.
Sometimes, you’ll need extra help—like a short course of chlorhexidine rinse, local antiseptics, or antibiotics for stubborn inflammation. X-rays at baseline, 6–12 months, and then yearly help catch bone loss early.
They’ll record gum health, pocket depths, and plaque at each visit to decide how often you need to come in. If there’s new bleeding or deeper pockets, don’t wait—get it checked and treated right away.
Enhancing Oral Hygiene Before and After Surgery
Before surgery, get into a solid daily routine: use a soft-bristled brush twice a day, pick the right size of interdental brushes, and use single-tuft brushes for tricky spots around implants.
Practice your technique with your dentist or hygienist until you’re nailing it.
After surgery, start with gentle rinsing and cleaning, then move back to brushing as your gums heal (usually after a week or two). Avoid metal tools or gritty toothpaste on your implants—they can scratch the surface.
Use implant-friendly tools: nylon or silicone brushes, low-abrasive toothpaste, and floss with a threader or special implant floss. If you notice bleeding, looseness, or a weird taste that won’t go away, let your dentist know right away to head off bigger problems.
Long-Term Maintenance and Management Considerations
You’ve got to keep up with home care and regular checkups to protect your implants from peri-implant mucositis and peri-implantitis. Good records, focused cleaning, and jumping on small problems early can prevent bone loss or implant failure.
Monitoring for Peri-Implant Diseases
At every visit, your dentist should look at your implants and gently probe around them to check for bleeding, deeper pockets, or pus. They’ll measure pocket depths and compare them to your baseline; if pockets get 2 mm deeper or you start bleeding, that’s a red flag.
Regular x-rays (taken the same way each time) help track bone levels. They’ll also keep tabs on plaque and gum tissue in your chart.
If there are signs of mucositis, your dentist will start with a cleaning and remind you about home care. If bone loss keeps going or inflammation sticks around, you might need extra treatments—antiseptics, antibiotics, or sometimes surgery—depending on what’s going on.
Scheduling Regular Dental Checkups
Book professional maintenance every 3–6 months, depending on your risk factors. If you’ve had periodontitis, smoke, have diabetes, or a history of peri-implant disease, you’ll probably need to come in every three months.
If you’re lower risk, you might get away with stretching it to six months after things have healed up and stayed stable for a while. It’s not a one-size-fits-all thing.
At each visit, your dental team will do mechanical debridement. They’ll use instruments that are safe for implant surfaces—think plastic, titanium, or those specially coated scalers.
Skip the aggressive metal instruments, since those can scratch up your implants. Professional polishing is part of the routine, too.
They’ll check your periodontal charting and might take radiographs if there’s a reason. You’ll also get reminders about oral hygiene—like which interdental brushes actually fit your spaces.
Water flossers can help with those tricky spots. Sometimes, they’ll suggest a chlorhexidine rinse for a short burst if you need extra control.